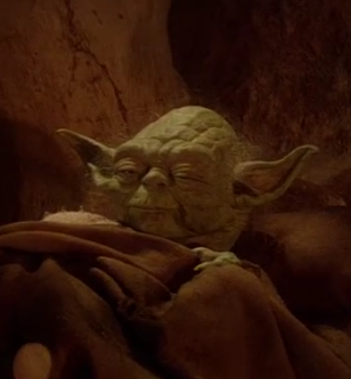
Adding Alt Text
Alt text is the text that appears when you hover over an image or link on most webpages. You can do this by adding title="title goes here" directly after the link to the image. This will come out like this (hover over the image for the title text);

The code for that should look something like this;

Resizing Images
If you want to resize an image for any reason, you can do so with the width and height modifiers, written as width(or height)="500px", changing the number to change the size. These go anywhere before the closing (>) bracket. You don't need to use both of them at once - if you only use one, the image will scale and just get larger. If you use both, however, you can stretch or squash it as much as you want. Like so;
<img src="/images/yoda.png" width="200px">
<img src="/images/yoda.png" width="500px" height="100px">

Hyperlinking An Image
To make an image clickable and linked to another page, we use the hyperlink code line first - that's <a href="Link">Text</a> - and, instead of having words in the 'text' part, we add the <img src="/images/yoda.png"> string in it's place. Then, we just replace the word 'link' with the URL of our target page. That should give you this;

All of the modifiers are still usable when they're inside the hyperlink code - the image above is still resized and has alt text, for example. You can mix and match these however you want and your code will always recognise them and make them do what they're supposed to.
Embedding Other Media
So, this one is a bit less of a DIY. If you want to embed other media, most websites will already have code ready to go for you, that fit their specific site and supports the content the best it can. On any website where embedding is available, there will usually be an 'embed' button visible somewhere on the page - sometimes this will have the word, and sometimes just the <> symbols. On YouTube, the embed button is under the 'share' tab;
This embed code is only two lines long, and actually includes some information we already know how to modify - namely width, height, and title. Because of this, you can actually resize the embedded video to any size you want, as well as change the title - this title is a little tempermental and will only show up sometimes, though.
Aligning Text To An Embed
Now, admittedly, I thought this was going to be harder than it is. When you start the <img src> line, instead of src, write style="float: left; padding-right: 10px;", and then add <p style="text-align: left"> and type what you want to type. This will make the text wrap around the image! The 'float' part makes the image sit on the left of the text, the 'padding' part makes a gap between the image and the text, and the 'p style=' added to the text makes the text align left so it's next to the image.

See? This text is wrapping around Yoda. When doing this, instead of closing your <p> bracket when starting a new paragraph, use the <br> line break instead - this means the text continues wrapping around the image. If you want your image to be on the right, just change the word 'left' in both the image code and the paragraph code to say 'right' instead.
Once you get to the bottom of the image, the text will place itself under the image, aligning itself to the left. Sometimes it won't do this until the next line down - if that happens, it's likely that the image is just slightly too big for the text to put itself there. To fix this, just take the image's size down a few px at a time until it adjusts and sits underneath. This might take a little trial and error!
For this, you can place align="right" anywhere in the attribute list. Instead of putting style at the start as you would with an image, instead style="padding: 10px;" can go anywhere with the other attributes in the list as well. If you have this embedded right at the bottom of your page, it might cause the formatting to go a bit wrong - to fix this, either resize the image so it's small enough to fit inside the text box, add more text until the amount of text fits the size of the image and stretches the text box, or add a </p> and then add <br>s until the text has passed the embed. Bear in mind, with embeds like YouTube videos, making them too small might make it a bit hard to use as the buttons on the video might overlap, so it's better to put embeds further up.
In both of these cases, the words 'left' and 'right' are subjective. For instance, the video is embedded on the right. Because of that, instead of 'align="left"', it's changed to '"align="right"'. The padding direction has been swapped - meaning it reads 'padding-left' instead of 'padding-right;, because the padding needs to be to the left of the image in order to have a gap between the text and the image.
